Thursday, September 6, 2012

Grandparent's Day -- Sunday, SuNdAy, SUNDAY!!!

Review by Melody:
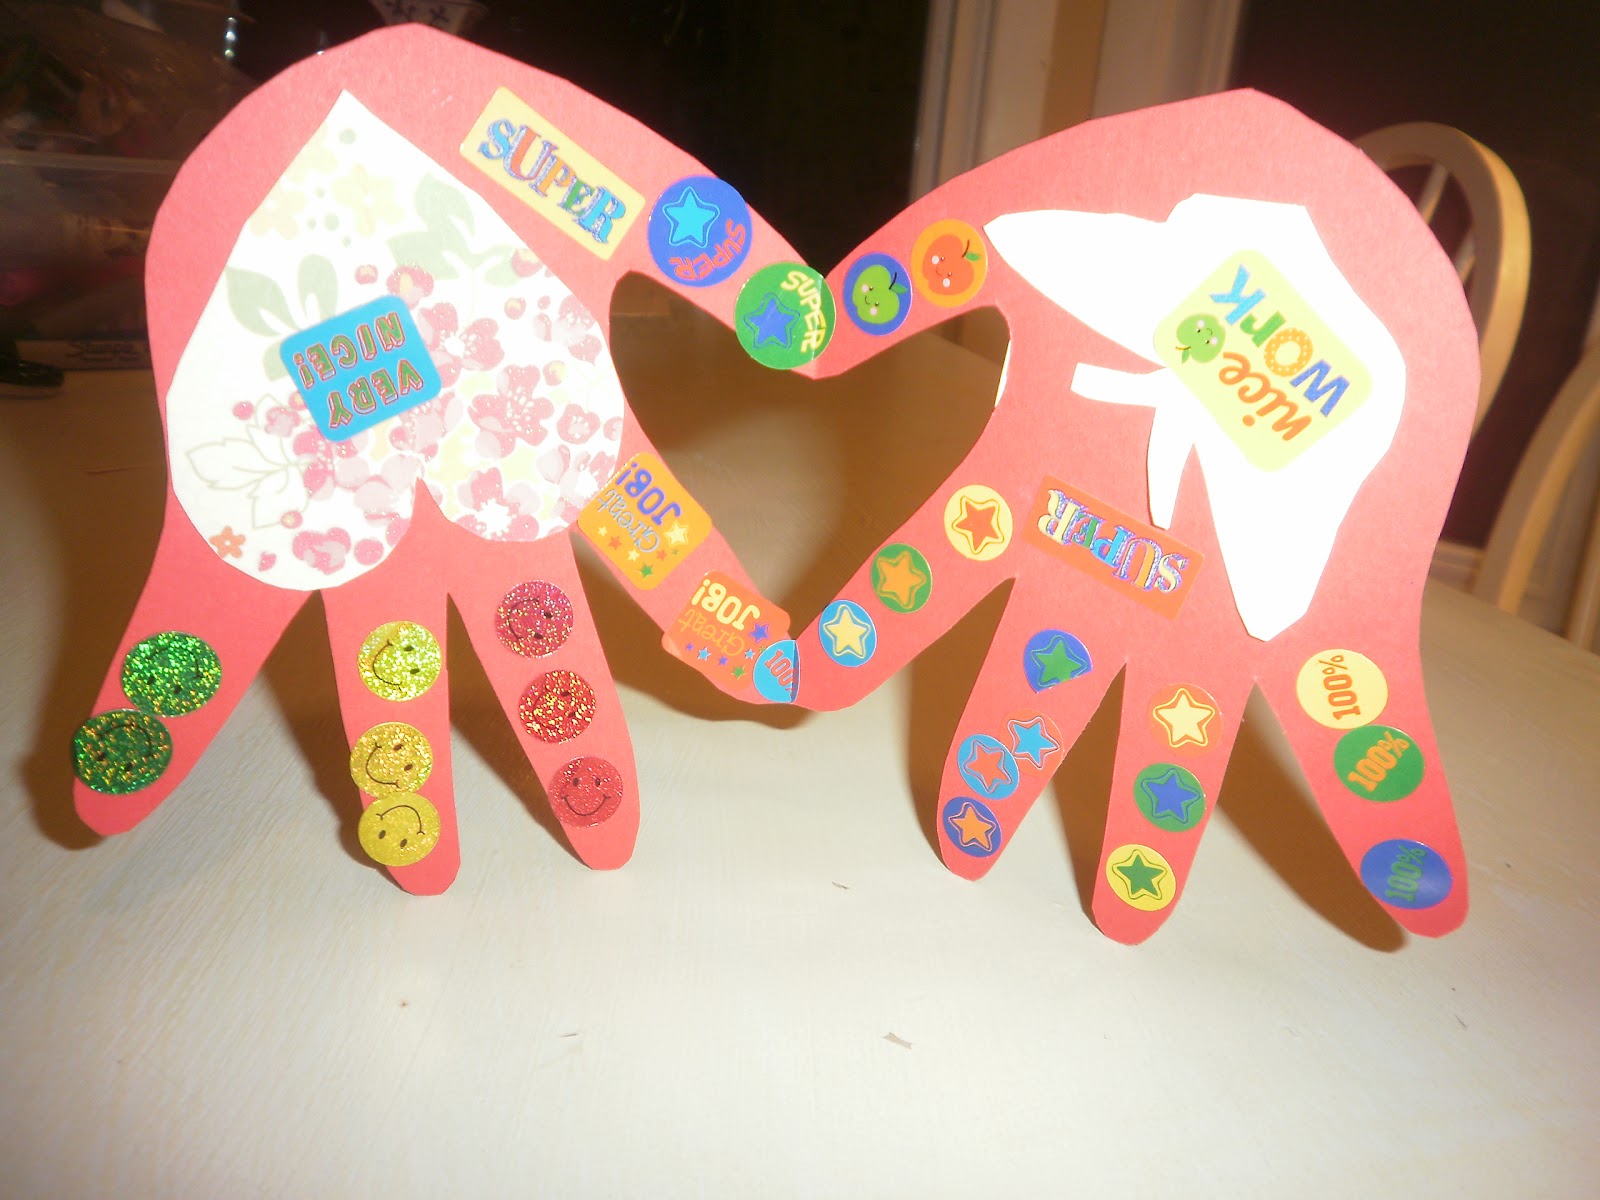
A recent "trend" has been the 'heart hand' gesture.  So, the kids and I tested out that gesture by incorporating it into one last grandparent's day gift.  Hopefully, you'll want to give it a try.  It was easy, fun, quick and allowed the kids to get creative!

Just fold a piece of paper in half, and trace your child's hand with the thumb and pointer finger on the fold, and then cut.  You'll end up with a unique greeting card from your little one to their grandparent. 

**Another Idea**  For those MOTs who want another angle at approaching this whole thing, take a piece of paper and sit the kids down and ask them to just spout off all the things they think of when they think of their grandparents.  Just let them have a little brainstorming session and try to write down all their little thoughts verbatim onto the piece of paper.  You'll find it cute, touching and humorous at the little things they view as important.  Then, write something like, "Reasons I Love My Grandma & Grandpa" at the top of the page.  Grandparents will love reading all the little personal thoughts from their little angels.

Happy Grandparent's Day to all those grandmas and grandpas out there!!

Wednesday, September 5, 2012

Grandparents...Spoiler Alert!!

Review by Melody:
If you are a grandparent of either of my children...stop reading now, or be prepared to enjoy your gift from the kiddos prior to Sunday....Happy Grandparent's Day!!! 

The kids and I have been working diligently on creating some fun projects for those special gray-haired, or no-haired, individuals in our lives!  In all seriousness, what would we do without you guys...I mean REALLY...what would we do without you to be there when we need a little break from those precious, lovely, perfect little angels?!?! 

This Sunday is the perfect opportunity to show our appreciation for those grandmas and grandpas out there.  What better than a hand-made gift from those little ones who they believe to be the most perfect, cutest, best children in the world -- their grandchildren!

Grandparents are easy -- they love those little handmade gifts from the kiddos just as much as mom and dad do, and they treasure them just the same!  After returning after a long weekend, Wee Ball practices, and church Midweek; the kids have finally produced some fine inventory.  First, our #1 Grandma awards, a first place ribbon personally made for the honored recipients. 

And next, the "I Love You...THIS MUCH (or "MUSH")" craft. 
These are simple projects, but you have to have patience, especially with younger kids.  For the perfectionist in me, I have to constantly tell myself that the gift is made even more special when it doesn't appear as if your toddler consulted their inner Martha Stuart when they created the craft.  I used some colorful scrapbook paper, and some pictures from the local store ads to help the kids.
Now I have to be honest with you moms of toddlers (I'll call us "MOTs"), these projects always start out very fun for the three of us.  However, towards the end, my voice is getting a little louder, patience is growing a little thin, and the kids seem to be determined to see who can make me combust first.  SO, make sure to space these crafts out a few nights.  They don't take a lot of time, but MOTs know that we have a short window of time to keep our kids interested in a specific activity.  You want to take your time and make this an event that is fun, not a chore, and ultimately made out of love. 

It's always good for MOTs to be reminded that these days are few, and we're gonna miss them!

Grilled gooey goodness

A Lyndee original-
I was so excited to make dinner when I got home. My grandma had sent me some freshly canned sauerkraut and I was salivating at the thought of a ham and kraut pita pizza. I pulled out the pizazz and assembled with a piece of flat out fold it bread, ragu, 2 slices of ham, kraut and 2% cheese. Only 12 minutes until glory, I thought. But when the buzzer dinged and I went to remove said pita pizza...disaster. Something had apparently been left on the pan from the time before and it had sealed like super glue to my "crust"! The crust stayed on the pan while the toppings came slithering into a heap on my plate. I only had about half an hour before I needed to leave and didn't have a ton of groceries on hand for a quick throw together meal. I searched the fridge and came up with an idea. It may sound weird but here me out because it was divine, ready in less than 5 minutes and probably cost about $1.
2 pieces wheat bread
Country crock light
Reduced fat pepper jack cheese
3 strips precooked turkey bacon

Yep! Bacon and pepper jack grilled cheese. I dipped it in 1 tablespoon (1/2 serving) of Ken's light honey mustard. It was simply delicious and way more fun than a normal grilled cheese. I would highly recommend it if you are ever in a pinch for time and want to break from the norm. Come on, let your tongue live a little.

Tuesday, September 4, 2012

Tissue Rosette Kissing Balls

Review by Rachael

I saw this idea while I was planning my wedding & thought they were so cute. I knew I wanted to have DIY wedding decorations and this looked perfect…or was it?! All you need is crepe paper (streamers), Styrofoam ball and a hot glue gun – how hard could it be? 


First things first, I had to find the items needed to make this. I was able to buy the streamers at a dollar store ($1 for one roll…score!) I had the hot glue gun and glue sticks at home, now I just had to find the styrofoam balls.  Who knew that would be such a task? None of the stores in town had them, I even tried Wal-Mart but they only had really small sizes the day I was there. I had to wait until I was able to get to an actual craft store to purchase these. But if you live in a bigger town or city this shouldn’t be such an issue.

Finally, I have all my supplies and now it's time to follow the directions and hope we come out with an amazing end result! The directions were very easy to follow and after a few mess-ups I was rolling crepe paper roses like nobody’s business. 


But the thing is that they are very time consuming. I rocked out 7 or 8 of these and was all excited. I applied them to the ball and barely covered any surface at all. I couldn’t even fathom the amount of these I was going to have to make to finish one of these kissing balls. And to think I originally wanted to make 30+ of these for the reception. Being a busy mom it was hard for me to find the time to sit down and finish this whole project. I would make a few roses a night & get them glued on the ball. I gave up on making more than one! They are really cute and easy enough if you have the time. The kids even tried to help at one point and the older ones were able to get it with a bit of frustration, but the younger two didn’t have any luck getting these to look like flowers…so depending on your child’s age you may be able to make this in to a family craft project.

I would recommend trying these if you have enough time to finish the whole thing.  


Spanish rice with some farm girl flavor


Review by Lyndee
I have found a few recipes for Spanish rice online, none of which have tripped my trigger.  They taste just like restaurant rice to me, which is blah and dry.  Here is a recipe for our family’s Spanish rice.  I guess it’s a true Iowa farm family recipe because well, we just had to add bacon.  And everyone knows, you can never go wrong with bacon.  My mom has always used white rice that you have to boil and not mess up.  I used the easy bags of brown rice that are pretty much idiot proof and make my lazy inner cook very happy.  Plus, in my head, brown rice is healthier than white. This entire meal costs about $8, is delicious and makes a hefty pot. 

Just four ingredients
I used three bags of the rice.  While that was boiling I cut a pound of bacon with a kitchen shears and added a small onion while frying.  

Once the rice is done, drain the water and add a quart of diced tomatoes.  I used some from Grandma’s garden but you can use a large can of store bought too. Let that simmer while the bacon finishes.  Drain the bacon and add to the pot.  Give this a few minutes to blend together and get the tomatoes heated through.  Salt and pepper to taste, dish it up and devour!  It’s super easy, tastes great and made enough that my husband had seconds and I still had leftovers to eat for lunch.   

Super tasty!

Drab to fab drinks!


Review by Lyndee
Have you ever been to a gathering where you set down your glass and couldn’t find it again?  Or does your family do like ours and use a sharpie to write on a red solo cup? This weekend we took the sophistication up a notch, at least in our head.  I used chalkboard paint to spruce up some wine glasses and a mason jar.  This way, at a party, you can write your name in chalk and know which glass is yours.  An experiment with glasses would not be complete unless you had a little something to add to it, right?  So I made the chalkboard glasses and a fun drink we will call the Blue Bomber.  Both were super easy, inexpensive and turned out rather well.  Check out the video of myself making the glasses.  


There is also one of Rachael making two glasses and actually following the directions on the spray paint can.  Silly, Sissy. I like to just wing it.  


But I think I have to concede that hers turned out just a tad smoother than mine.  I wasn’t able to locate chalkboard paint in a jar so we went with the spray point variety from Walmart.  It was $4.  I used to glasses I had from home and two that I bought at the local thrift store for 50 cents each. This was a pretty cheap project that turned out awesome.  I will definitely use these glasses at future parties.  The only caveat we found, if you are drinking a cold drink or one with ice, it will condensate and eventually start to smear off your chalk.  If you were drinking a wine or drink without ice you should be fine.  I was also using chalk from 1986 we found in my mom’s basement so that could’ve played a role too. 
Glasses pre-party

Painted, chalked and ready to roll
For the Blue Bomber I mixed ice, blue Hawaiian punch, lemonade and vodka.  You could use a flavored vodka or UV or whatever trips your trigger.  I went with plain and cheap.  The juice was $2.50, lemonade was $1 and the classy five o'clock vodka was $14.99 but I hardly put a dent in the bottle.  The concoction was good but I felt it needed a little something extra so I added half a can of sprite to the mixture.  That added something fun.  This is a fruity and summery drink that tastes great.  Careful of how much you consume, of course, as a drink that tastes like kool-aid can sneak up on you quickly.  


Saturday, September 1, 2012

Volcano at home with the kids

Here's a video with Rachael on how to make a fun science experiment at home with the kids. All you need is baking soda, food coloring, vinegar and two cups. Kids love it!
http://www.youtube.com/watch?v=5QaSMzfmxFY